STANDARDEveryday choice
Rufus 4.15
Download, open, and get to work.
No installation wizard needed.
SMALL TOOL. FRESH START.
Create a bootable USB for your next Windows or Linux install. Start with Rufus, then follow a straightforward guide.
An independent guide. Downloads link to the official Rufus project.
01 / GET THE TOOL
Pick the edition for your Windows PC. Every download goes directly to the official GitHub release.
Download, open, and get to work.
No installation wizard needed.
The same tool, with settings stored in a local configuration file.
ONE TOOL. A FEW GOOD REASONS.
Prepare USB installation media from a Windows or Linux ISO.
Create media from a supported live ISO and follow the distribution’s instructions.
A focused Windows utility without an installation step.
02 / MAKE YOUR USB
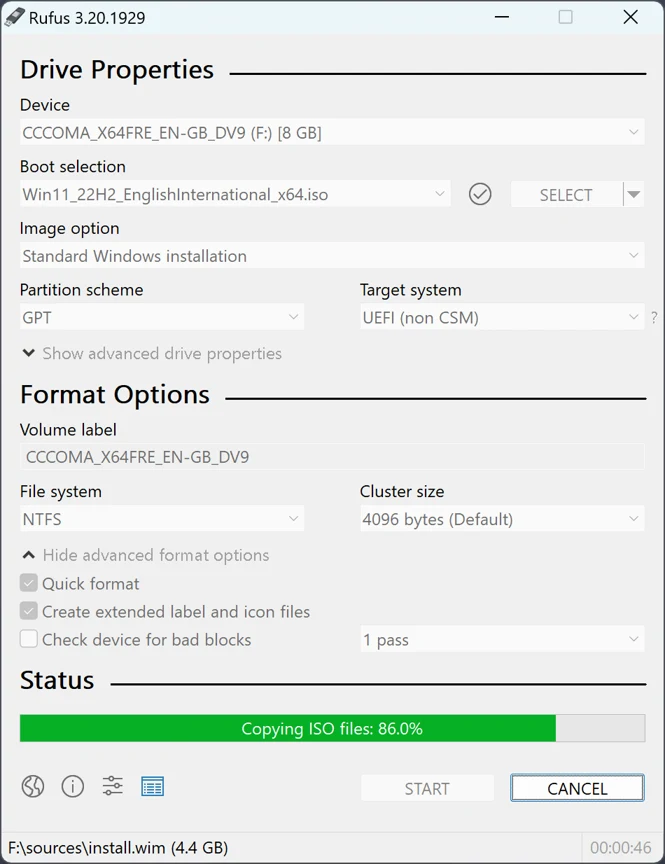
For a Windows 11 USB, use a drive with at least 8 GB. Larger ISO files may need more space.
Open Rufus. Choose the correct USB under Device, then use SELECT to open your ISO file.
Choose the partition scheme for the PC you will boot. Check the guide below if you are unsure.
GPT or MBR?Review the settings, select START, and confirm only after checking the drive. Wait for READY, then safely eject and use your PC’s boot menu.
Need more detail? Read the official Rufus FAQ.
03 / PICK THE RIGHT FORMAT
Check the firmware mode of the computer you want to boot. For a Windows installer, the usual pairing is GPT with UEFI, or MBR with legacy BIOS.
Microsoft’s partition guideChoose GPT as the partition scheme and UEFI as the target system for a Windows installer on a UEFI computer.
04 / A LITTLE CLARITY
Answers to the questions that come up most often.
Yes. Rufus is free and open source under GPLv3 or later. The official project provides its downloads without a purchase.
No. Run the downloaded executable on Windows. Both the standard and portable editions work without an installer.
Rufus runs on Windows, not macOS or Linux. It can create USB media for supported Linux images while running on a Windows PC.
The portable edition creates a local rufus.ini configuration file so you can keep settings with the program. Both editions offer the same core functionality.
Check that the ISO supports your target PC, that the USB appears in its boot menu, and that the selected firmware mode matches your media. Follow your PC manufacturer’s boot instructions.
Official boot troubleshootingWriting the USB erases the selected drive. Back up its files and verify the device before confirming. Rufus cannot undo an accidental overwrite.
READY FOR YOUR NEXT INSTALL?
Choose your download, keep your ISO handy, and take it one step at a time.